Expansion
GG, 25 December 2018
It is pitty, but I had no time recently for my blog and I am really sorry for this. I hope a new year 2019 will be a bit easier for me. Anyway, I have got some spare time to share with you my last update which I have done to my mobile testing platform. Due to fact my company is splitting in half and QA jenkins will be buried alive and looks like my jenkins will be spread across the newly born company then I am going to need some more slots to manage new users. So far only me and my job partner ware using ths platform. Now whole company will be doing it. How to handle with this? Let’s use a SLAVE jenkins. machine.
1. Slave machine
The whole idea is to distribute some of the jenkins tasks to some remote machine. The connection is supported via JNLP. The tasks are run on MASTER machine and the HTTP request go straight to SLAVE machine where are executed. This leads to offload the master machine. In my case it is also a great way to get access to IE browser which I was missing on iOS. For a testing purpose I was given a PC with Win10 which was left under my desk and I could access it in every moment remotely to run some manual tests. For over 90% of time it wasn’t in use at all so for me looks like a great candidate for a SLAVE machine.
2. Master configuration.
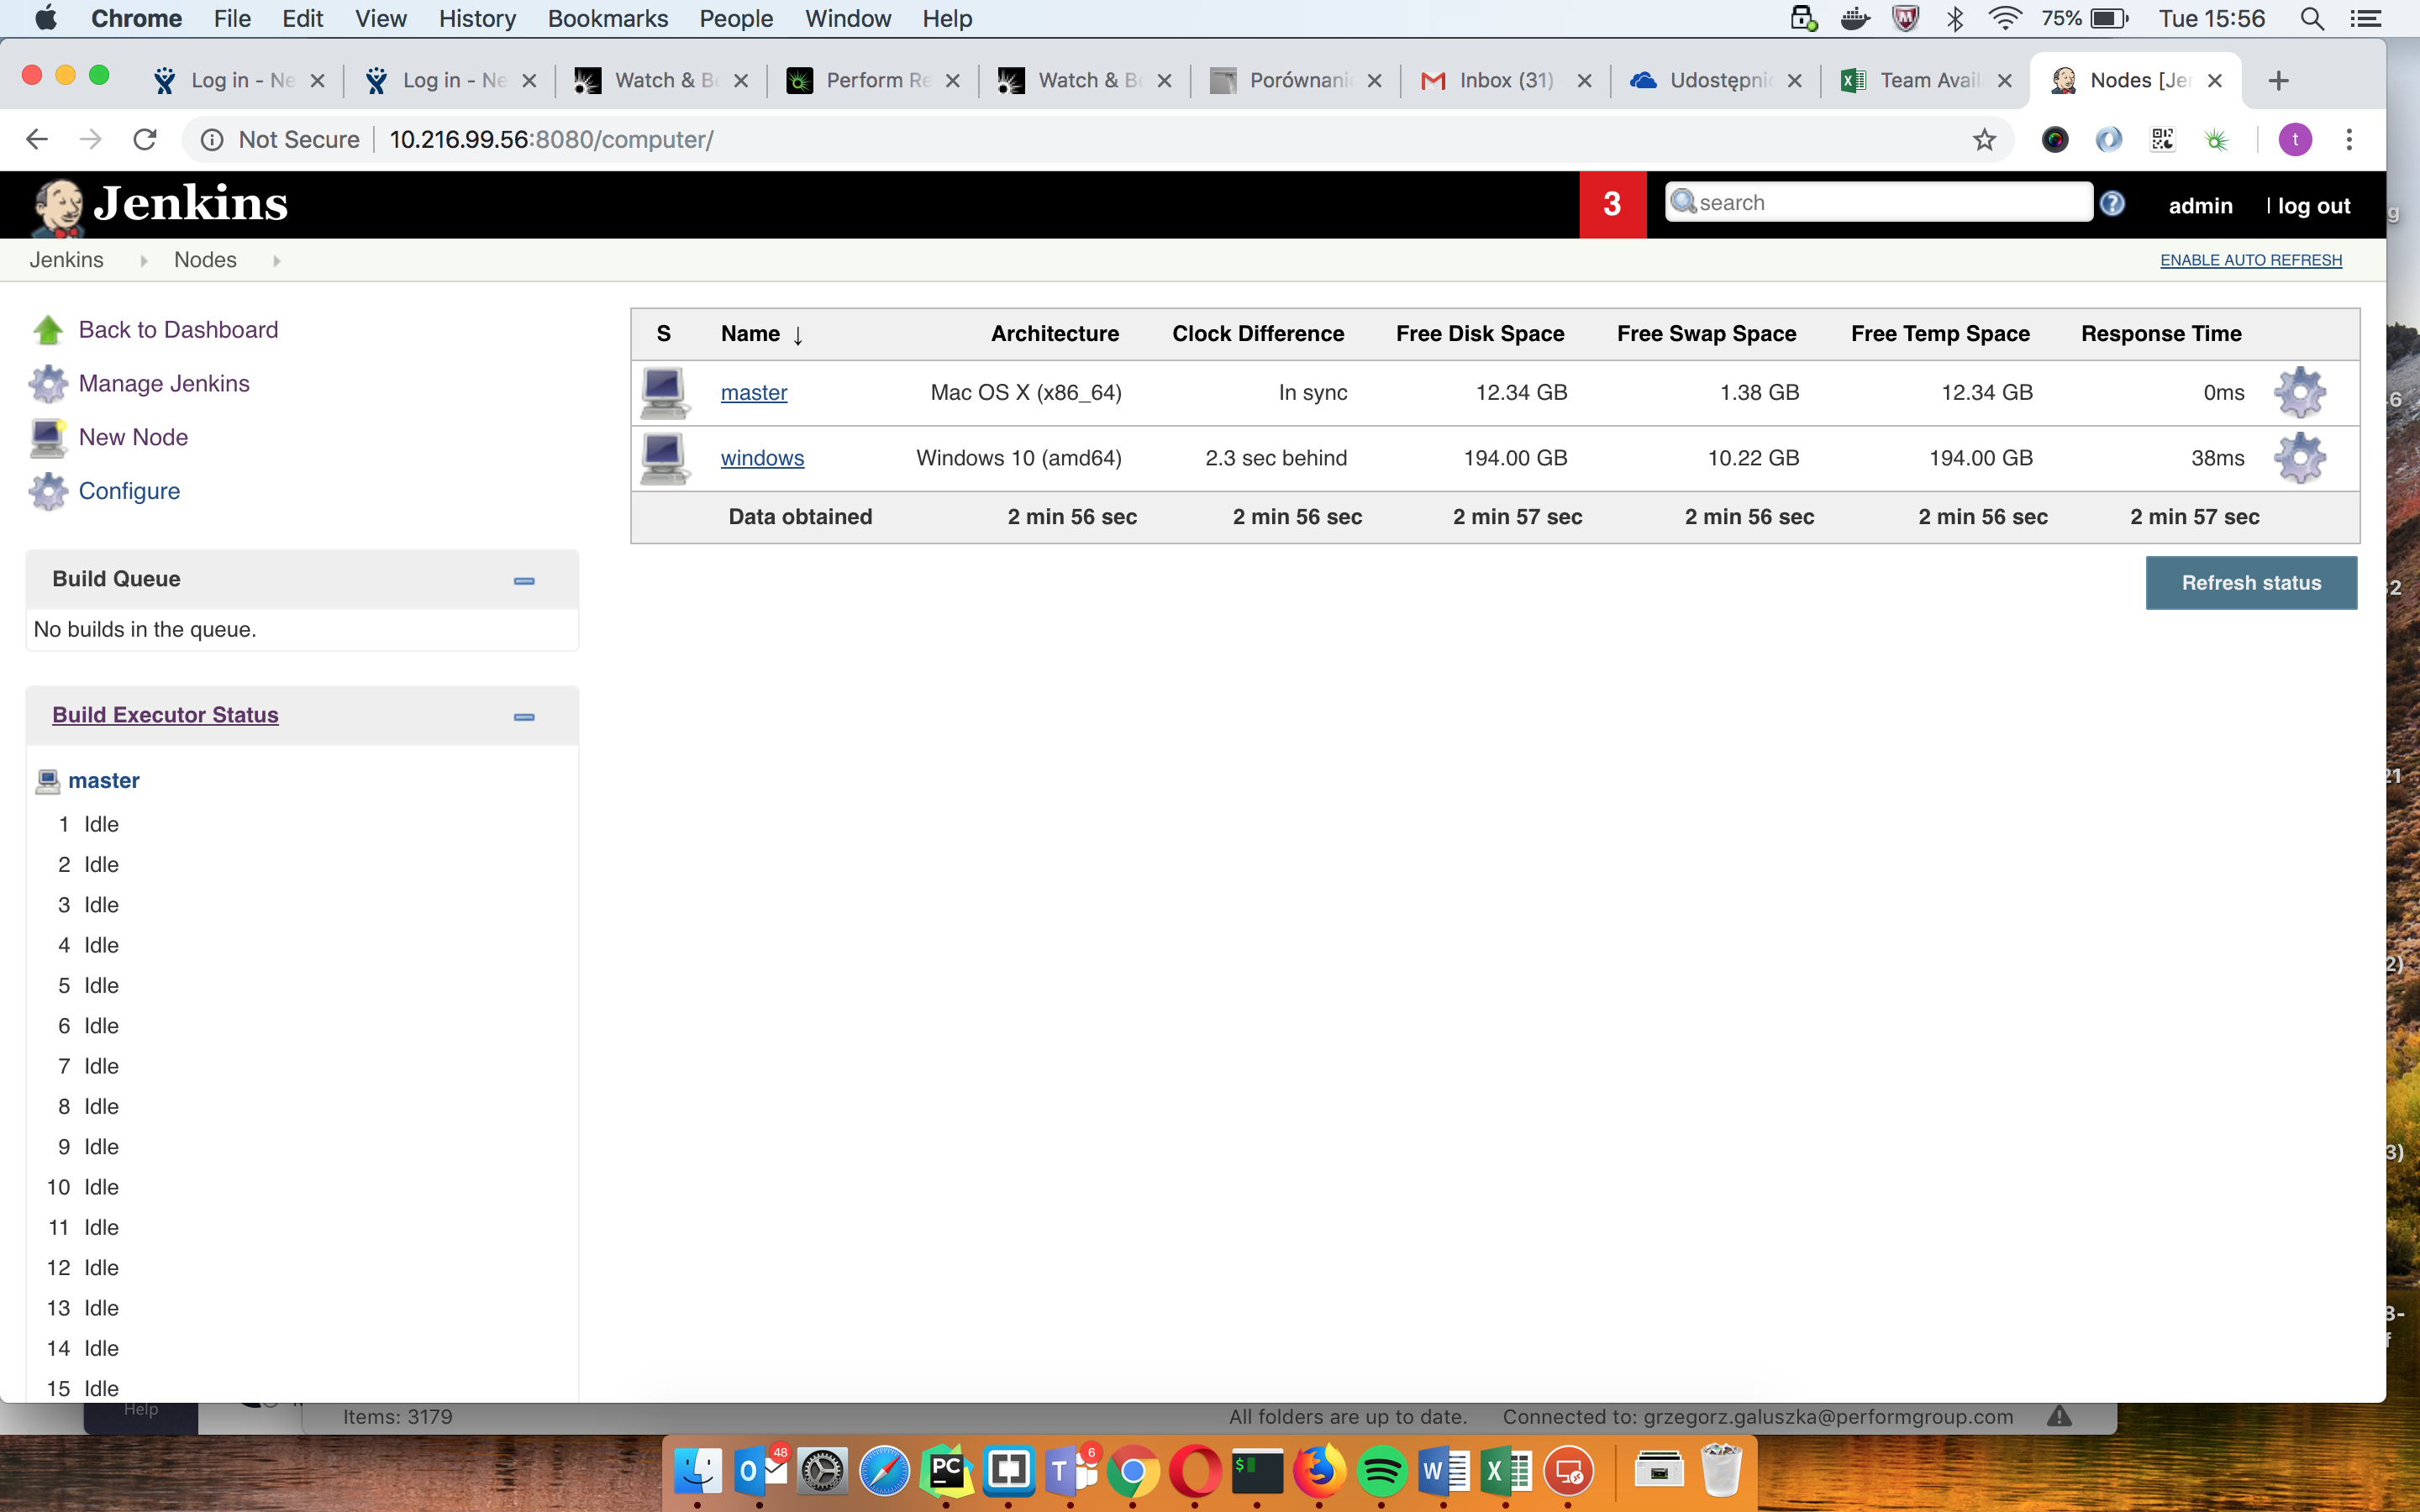
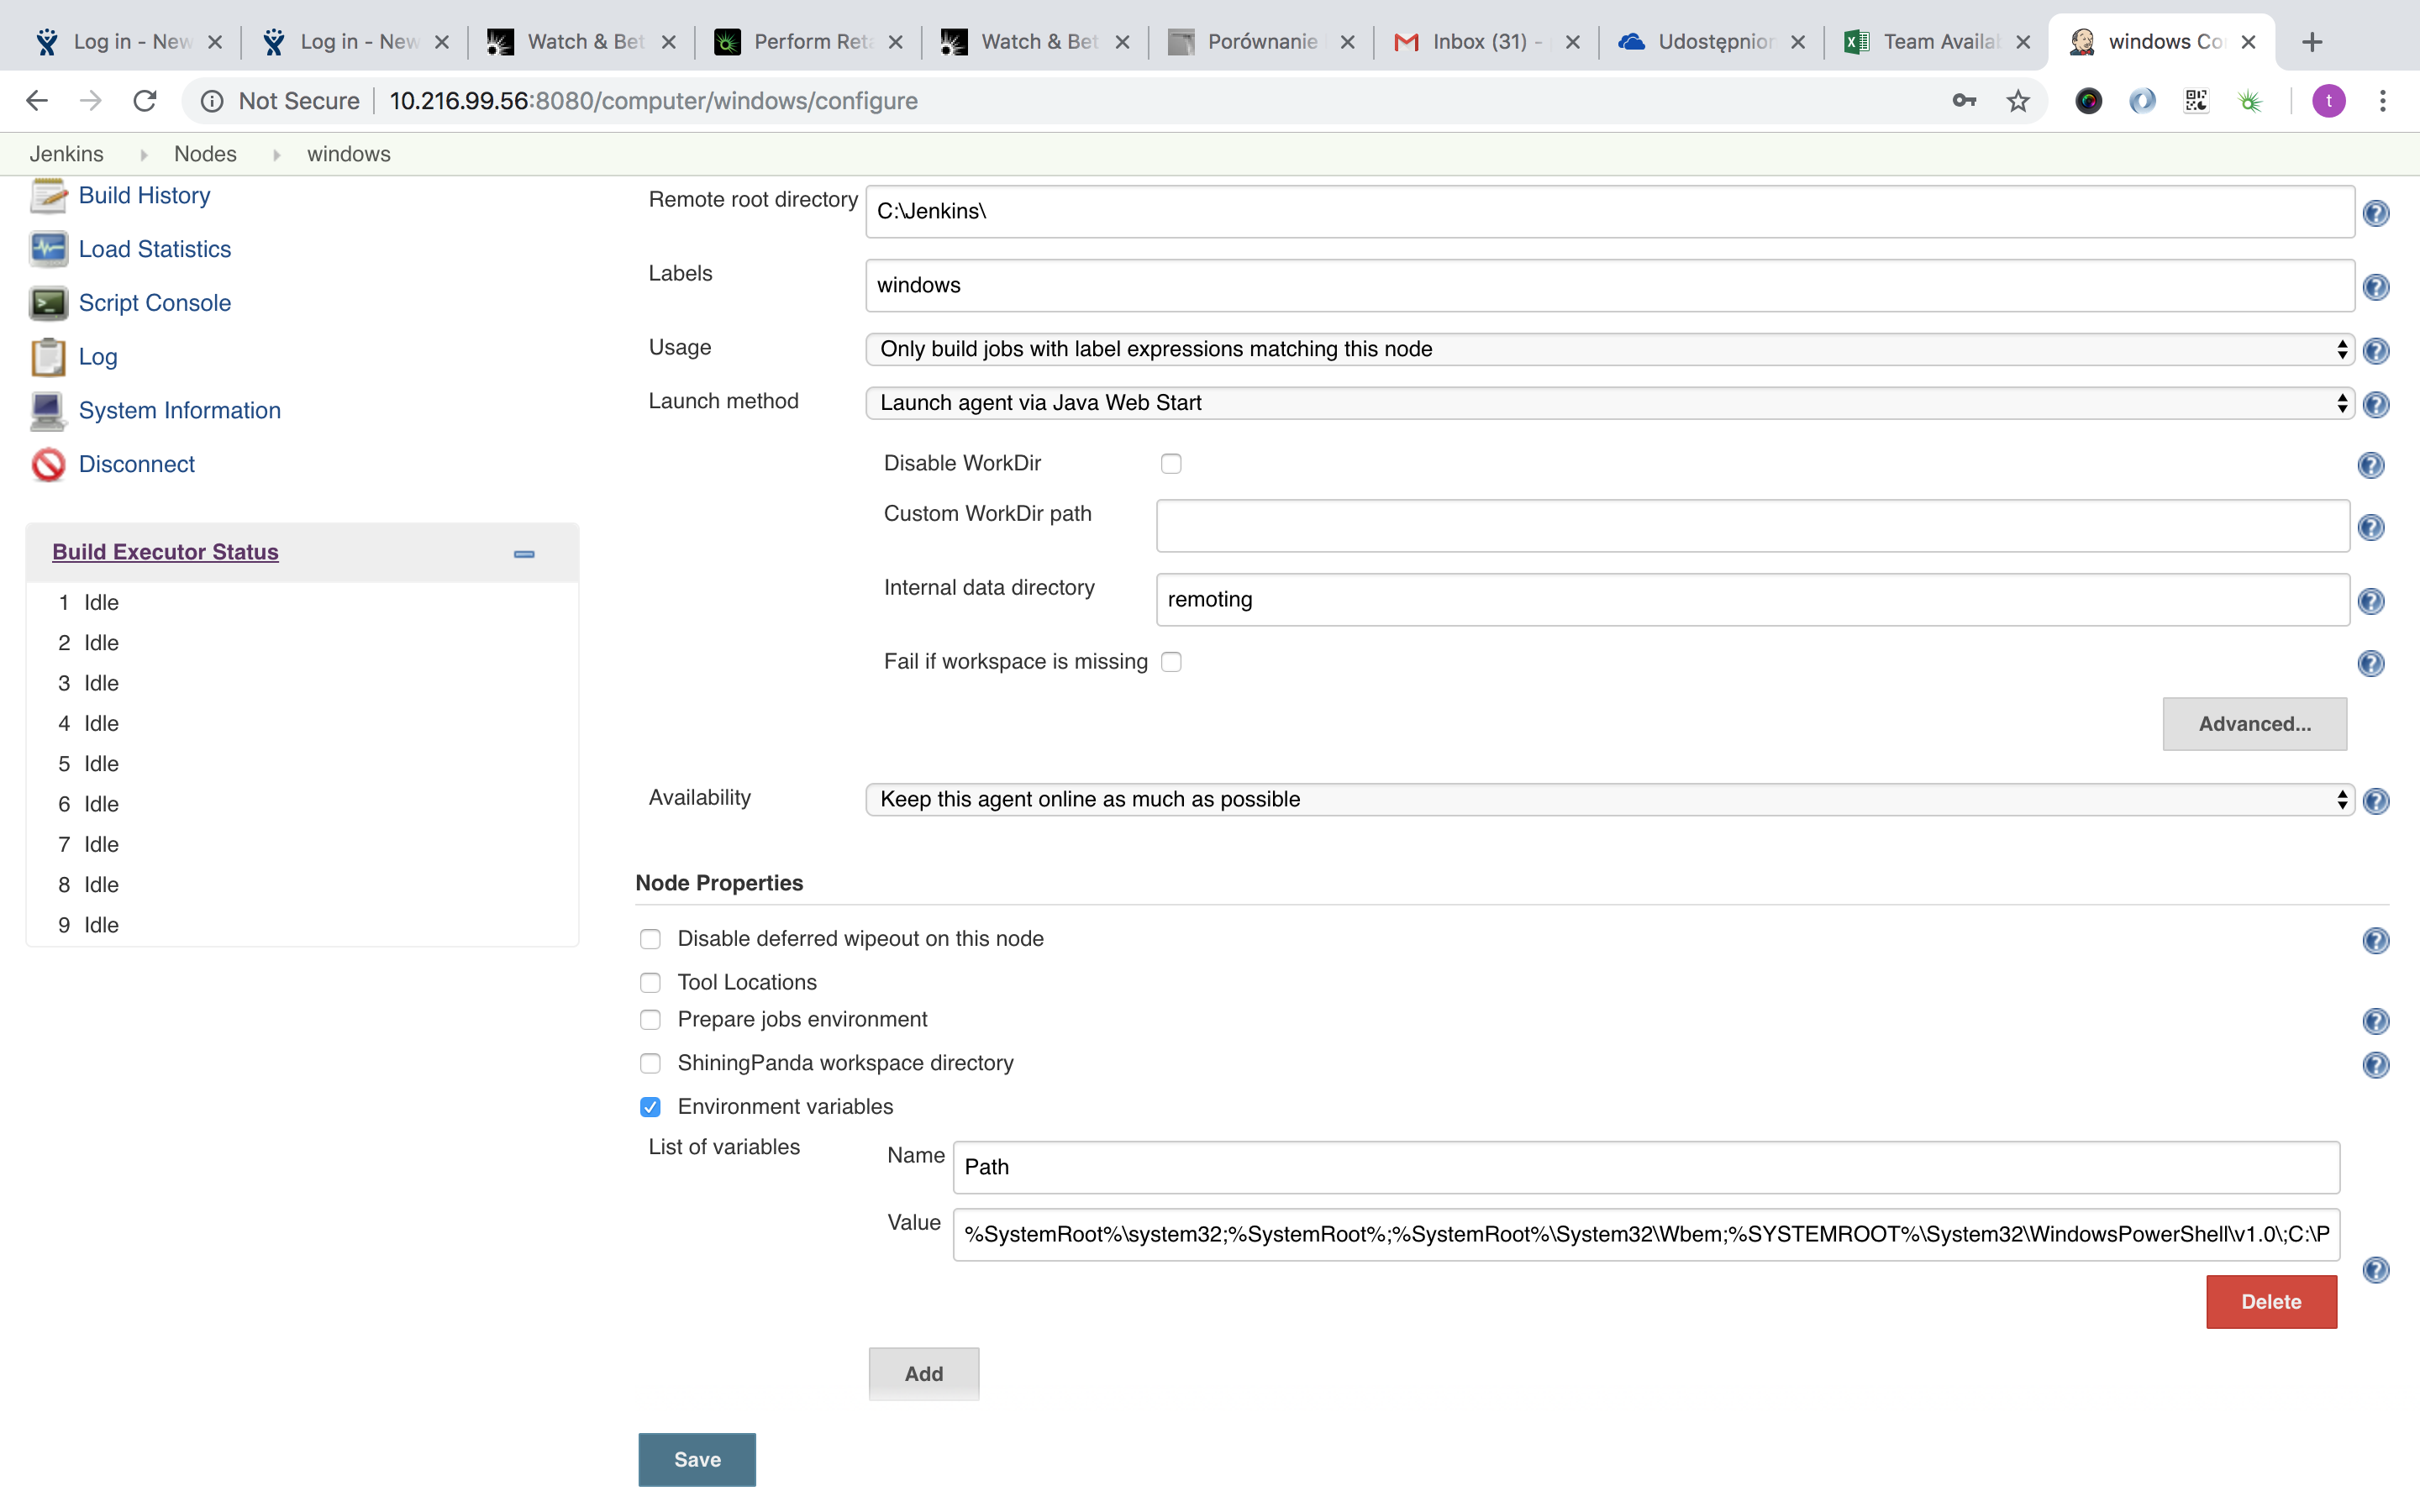
The whole idea is pretty common so there is a lot of documantation availiable directly on jenkins during configuring a SLAVE machine. First of all go to Manage Jenkins on a main manu on the left and then Manage Node.
 Then in configuring a new node window, make sure you set as follows:
Remote Root directory - typical directory where you are going to install jenkins on slave machine. C:/Jenkins will do.
Labels - this is how you will point to this node in a jenkins job configuration
Usage - Due to the fact that we have got some mobiles pluged into master machine and there are no such a devices plugged into slave then this node should be reserved only for desktop browsers. To make it easy usable we need to set it as Only builds with label expressions matching this node
Launch method - Most important part and it needs to be Launch via Java Web start
Internal data - Remoting
Availiability - Keep this agent online as much as possible
Environmental variables - Just tick it and the rest will be filled automatically.
That’s it. Let’s save it.
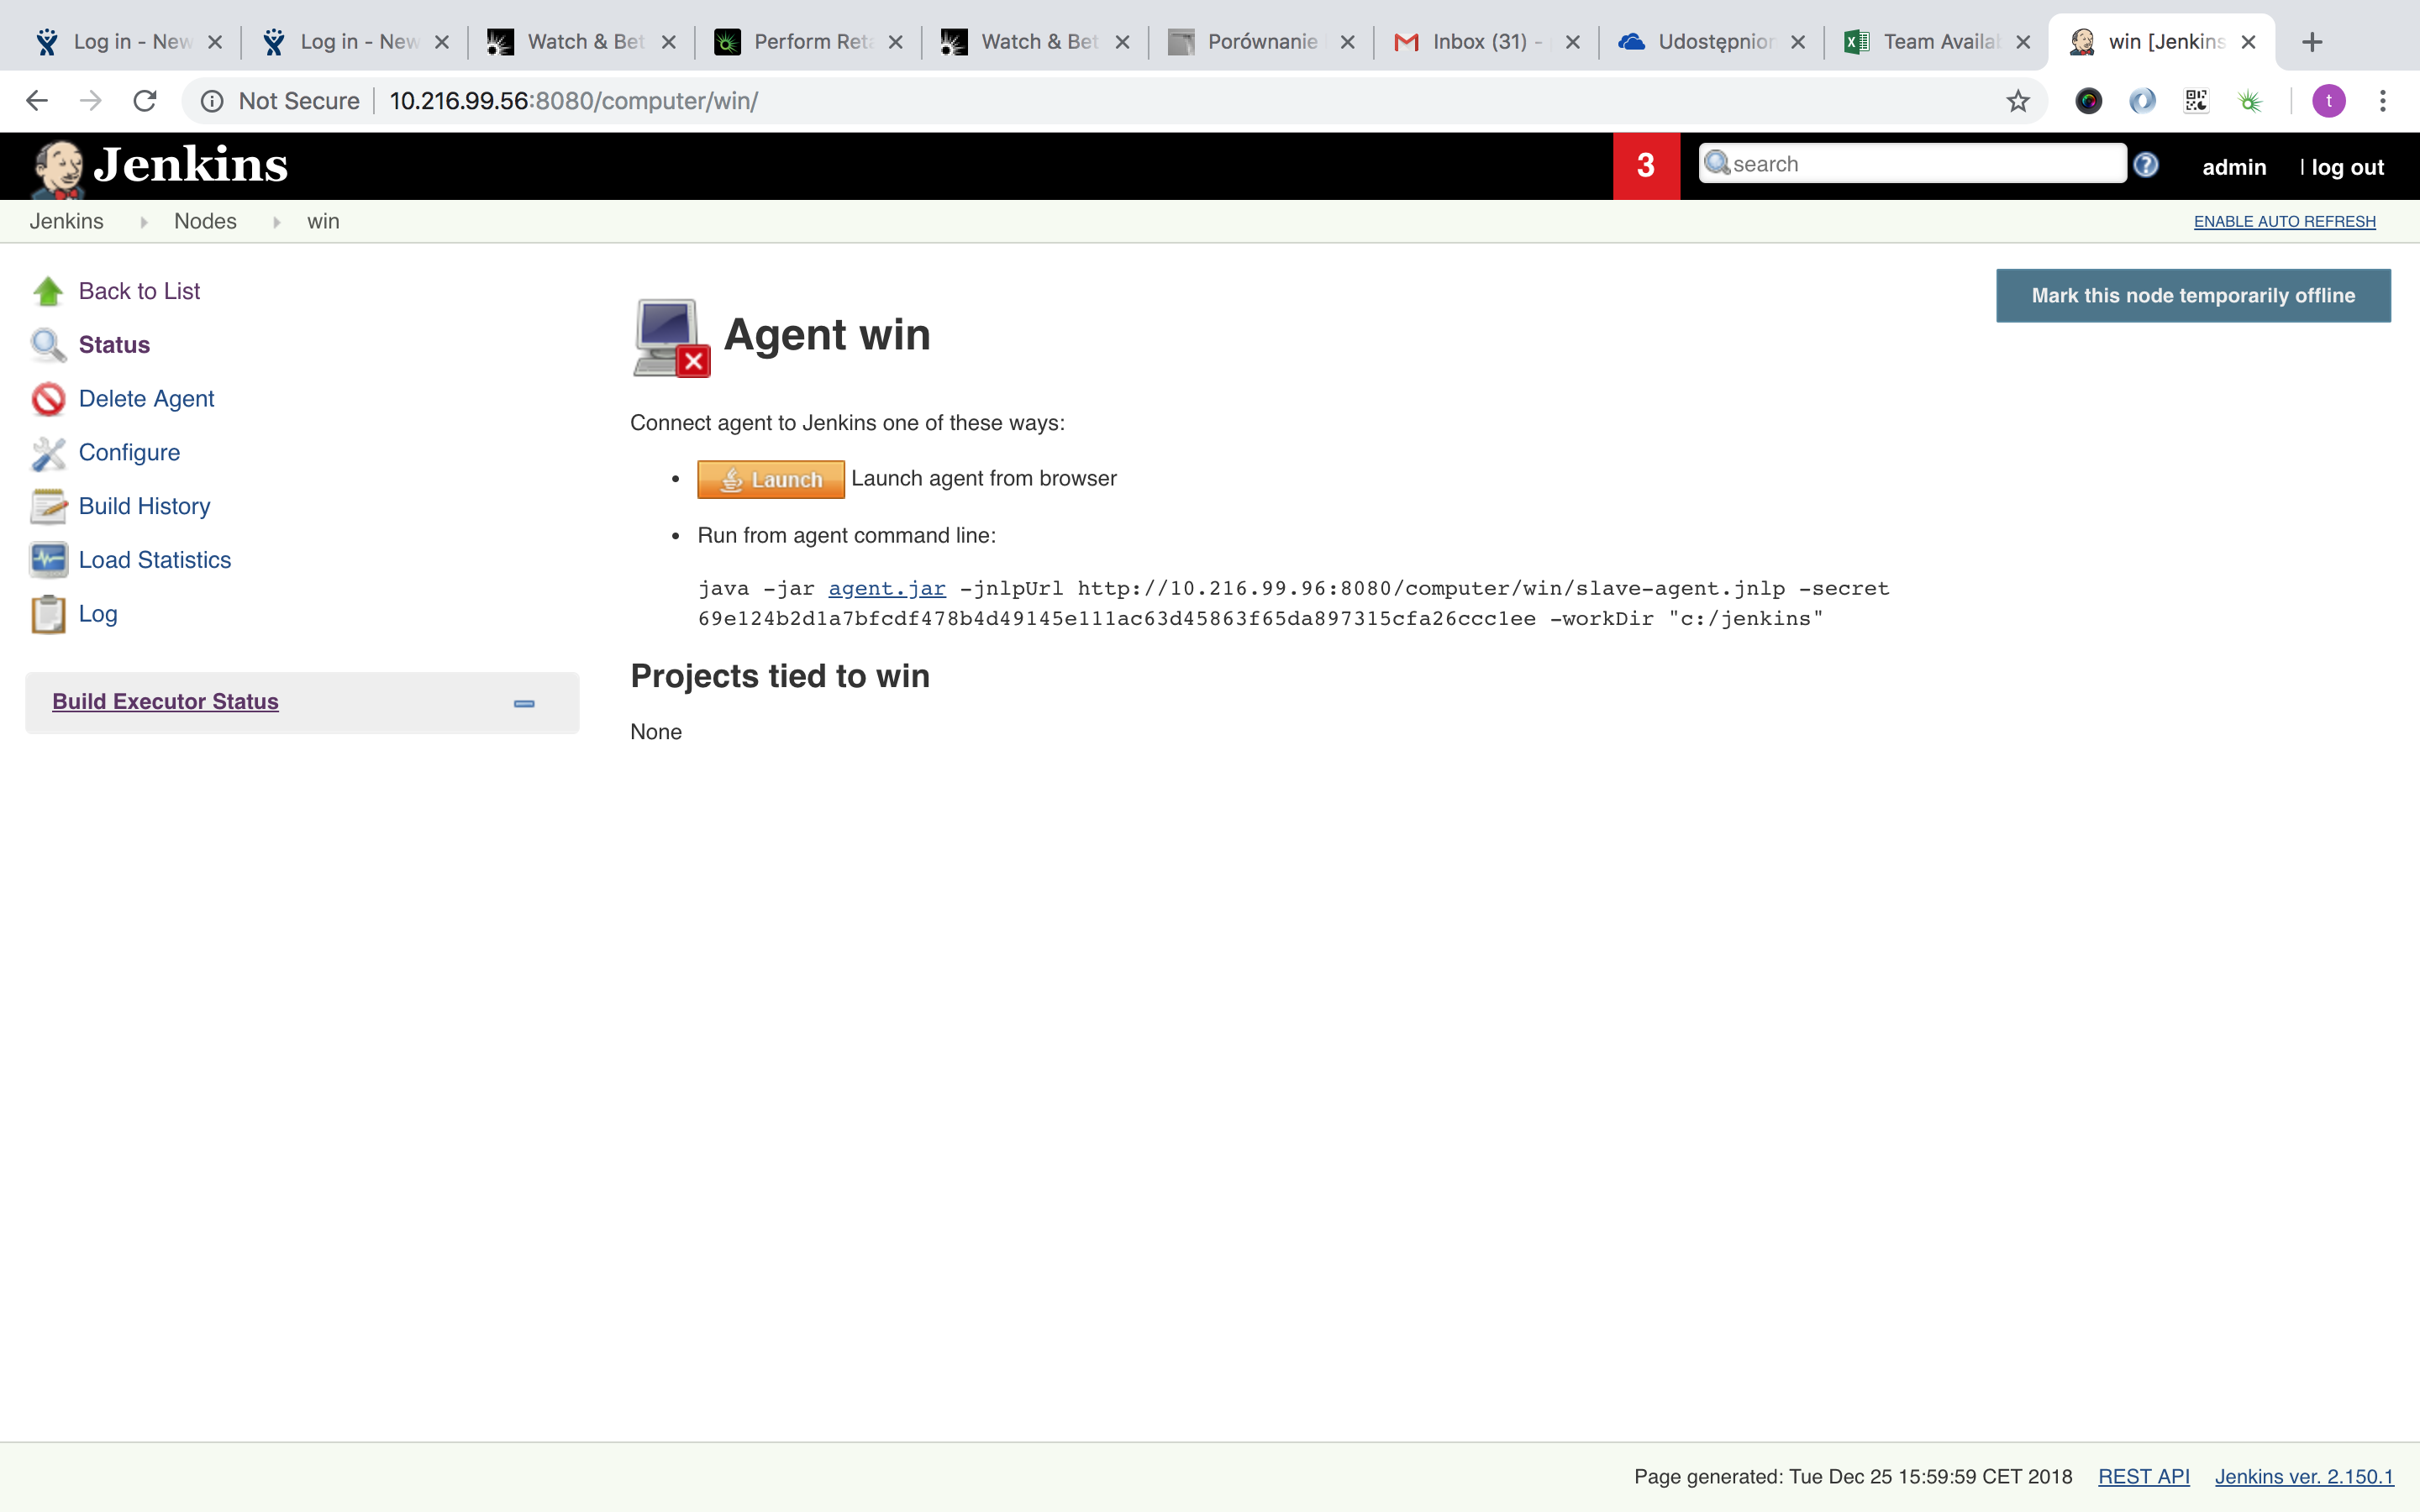
Cool. On the next page you will be proposed two ways of running jenkins slave. I recommend the second one. Download agent.jar file and save it on slave machine. Keep this page open. Now we are going to slave configuration.
3. Slave configuration.
We are half way there. Let’s go to SLAVE machine now. You need to install Python of course and Java to run .jar file. You might be wonder if you need to install all your pip plugins in here - not any more. There are better solutions. It is highly recommended to run your test on insolated environment. It is less important while you run them locally or you have got your own jenkins but when x number of users starts to install their own plugins then it is a great time for Shining Panda plugin which I will describe in next chapter. Now all you need to do is to follow the intruction displayed on your MASTER machine. Let me remind you - there is a bug in the instruction - workDir variable is between “” which is not allowed in windows terminal. When you try to run it as it is you will be exceptioned. Simply skip “” and your SLAVE agent is running. Let’s get back to MASTER.
4. Shining Panda and others.
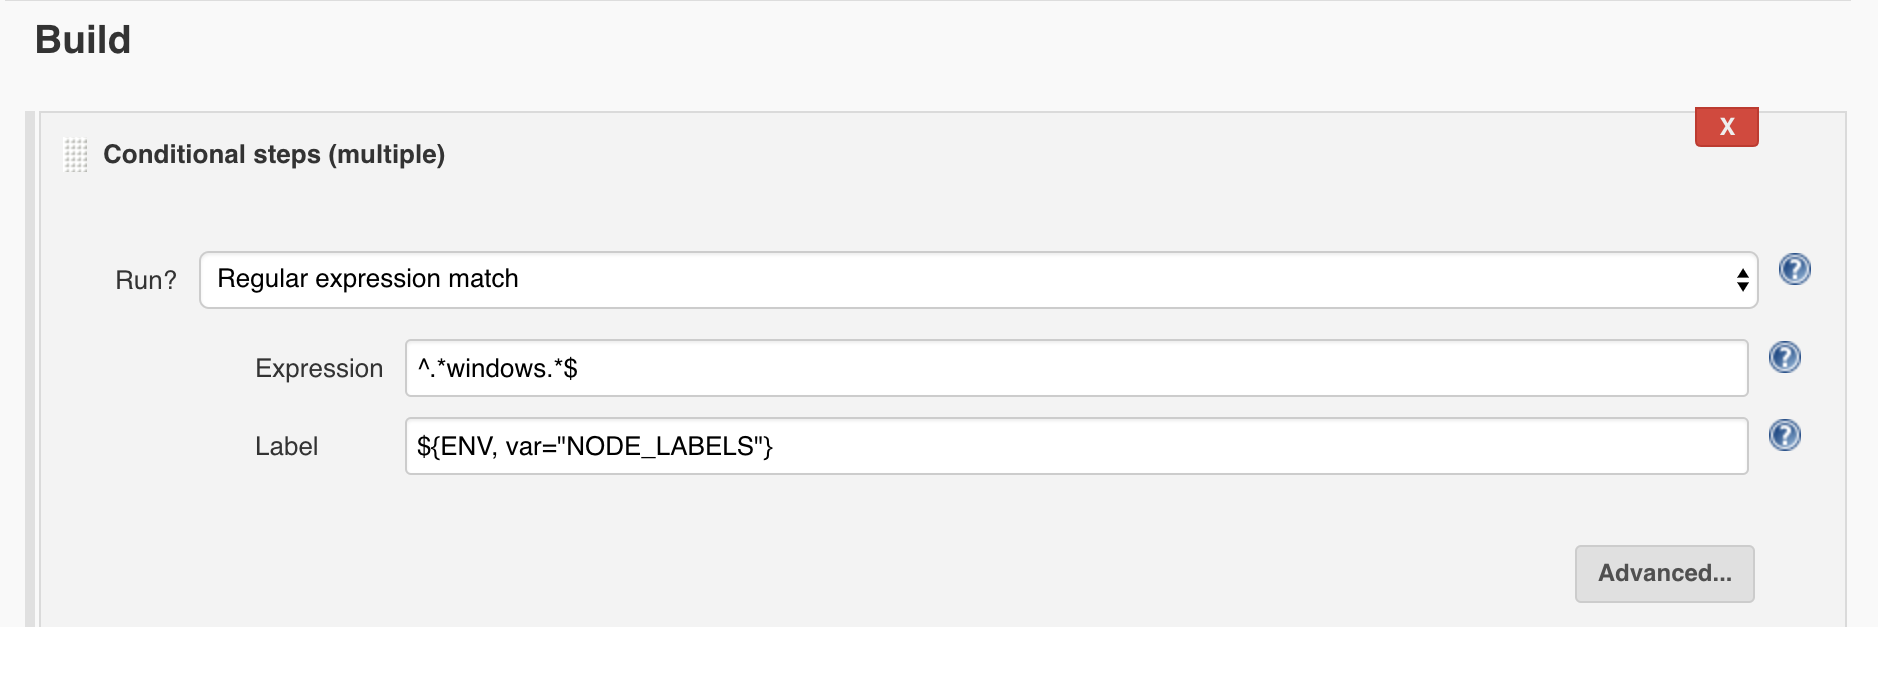
Let’s go to task configuration. To redirect this task to SLAVE we need to set a BUILD step and move it up as much as possible. Simply set it like this:
Now to make sure environments used by jenkins users will not cross each other we are going to use Shining Panda plugin which can be easy installed via manager. Once created directory will be used everytime for configured jenins job. All what we need to do it now is to make this task parametrized and use one of following Python versions:

Don’t be worried for this low Python versions - It is used only for pip install command and has no effect on your tests as fair as I know. Just select one from the list and you will be fine.
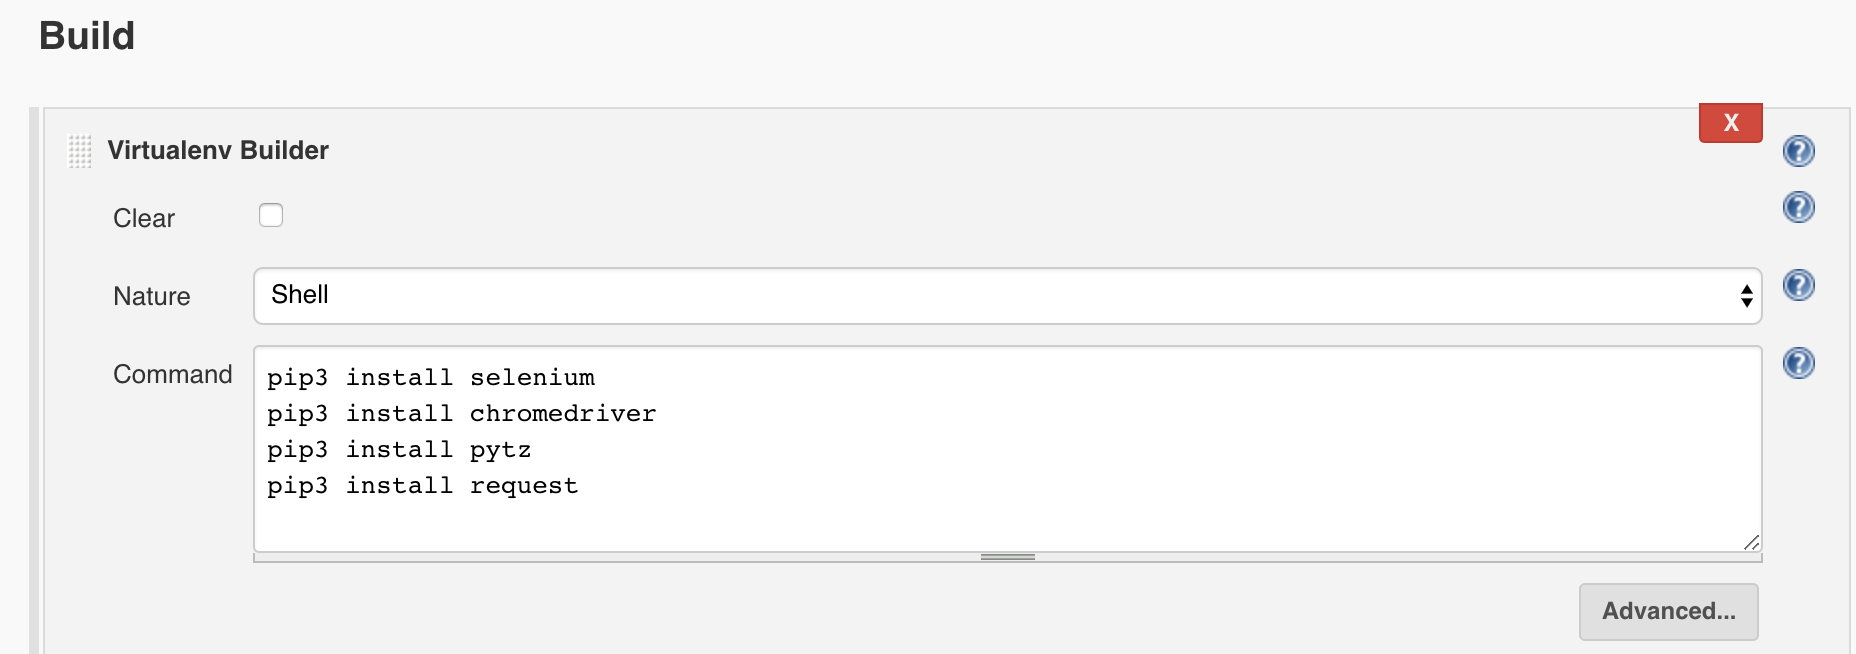
Now all your libs and plugins which are going to be used in the test needs to be declared. Once again go to BUILD section and look for Virtualenv Build. Now simply put all your installing commands in here. Shining Panda will take care of them.
And that’s it. Now you can run your test on SLAVE machine. But now I have got a conclusion - My team leader pointed that this mobile testing platform was kind of proof of concept. Now it is pretty stable and fully usable and maintainable but there is no need now to use our own physical devices if we know how to run mobile tests. He said it might be a good time to consider a cloud solution. Personally if I would have some budget for it - why not. It will be even more stable solution and will give us option to run tests on more devices and configurations. If we decide to switch to cloud I will of course discribe it on this blog I promise it to you.